
Protecting the excel workbook with a password is the best way to prevent others from accessing data in your excel workbook. This ensures that the data in workbook will be accessed by only authorized person, the person who has the password to unlock this.
Before implementing protection with password on excel file, you must go through below points.
1: There is no Forget Password option. Microsoft cannot retrieve forgotten passwords, so ensure to create the password that is especially memorable.
2: Passwords used here are case sensitive. However, there is no restriction on the length, characters or numbers.
In this post, we will demonstrate you how to implement file level protection on MS Excel workbook with password. This will lock your excel file so that the other users can not open or modify it.
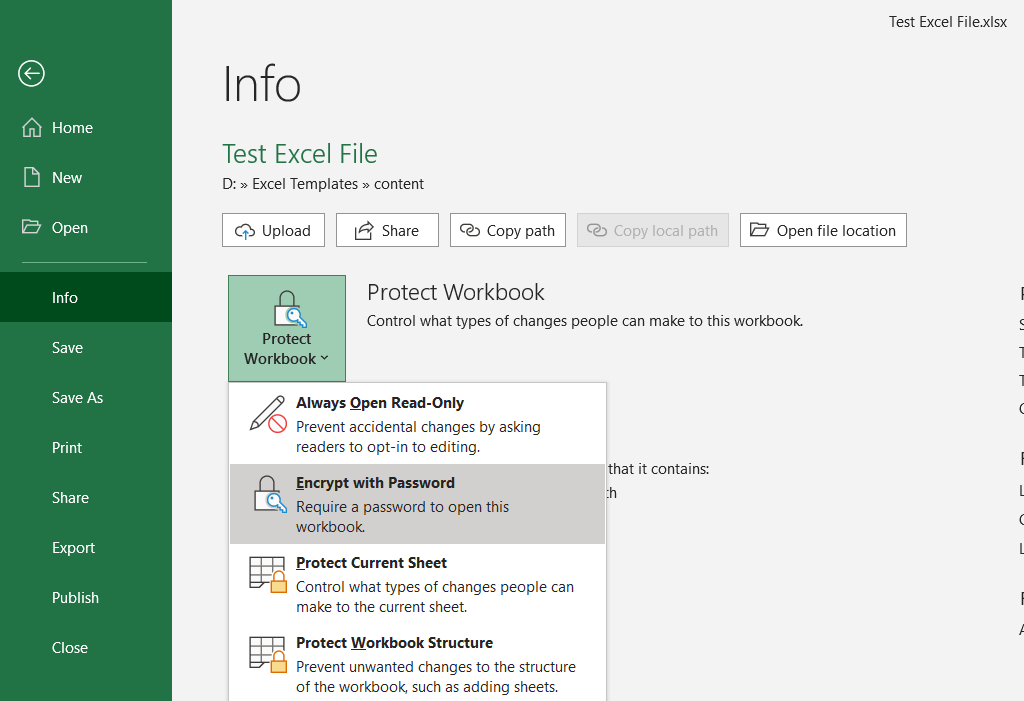
Step 1: Select File > Info.
Step 2: Select the “Protect Workbook” box and select “Encrypt with Password”.
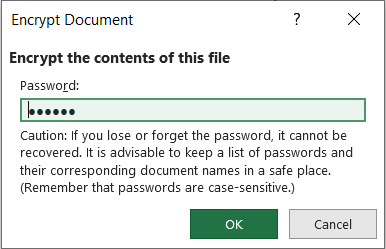
Step 3: Enter a password in the Password box, and then select OK.
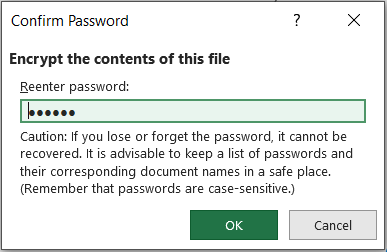
Step 4: Confirm the password by entering it again in the Reenter Password box, and then select OK.
Step 5: Save the excel file.
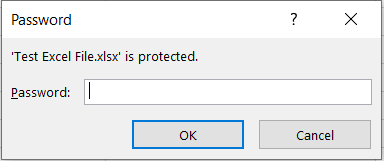
Now, your excel file is locked. When you open it, it will ask you to enter the password. You need to enter password to view or modify any content inside it.
You can refer to this article, if you need to open password protected excel programmatically